Thursday, Nov 15, 2018

Building Arduino powered Nixie Clock
In this blog post, I won’t talk about JavaScript, C#, or ASP.NET. Instead, I’ll go a level (or two) lower and talk about good old Nixie tubes and how to build a clock using them along with Arduino’s almighty power.
Introduction
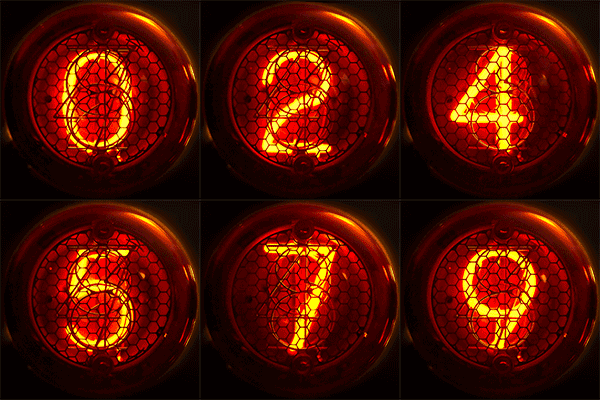
To get started, we need to know what Nixie tubes are. Per Wikipedia, Nixie tube, or cold cathode display, is an electronic device for displaying numerals or other information using glow discharge.
Nixie tubes were, in the past, a great solution if you had to display data without using blinking lights or a mechanical dial. Though beautiful (note: I am opinionated here), they have been replaced by more modern display methods (VFDs and later LEDs), and with some exceptions, are even no longer produced.
In the past few years, Nixie tubes are being revived (nostalgia?), and used in many DIY projects to build different displays, mostly clocks. I must give kudos to the Czech engineer Dalibor Farny, who manufactures them.
There are several online shops that sell different tubes, as well as matching or variable power supplies for them. I bought IN-1 tubes off eBay from a Ukraine-based seller, as well as matching driver integrated circuits (more about that later).
Arduino fits this project perfectly as it - with Nixies - creates a mix of modern and vintage tech (since microcontrollers were unavailable at the time when these tubes ruled the world).
Some Nixie clocks have 4 digits (hours and minutes), some of them have 6 (seconds included), and I’ve even seen versions with the date (4 more digits for days and months). In this project, I’m going with 4 digits only. Additionally, I’ll have two small INS-1 tubes which will serve as indicators, and will be fitted to form a separator (colon) between hours and minutes, and will blink every second. Cool, right?
Read on to find out how Nixies operate, how to drive them, how to “keep time” if there is no power, etc.
Hardware
A few more details about Nixie tubes and how to use them
The glass tube contains a wire-mesh anode and multiple cathodes, shaped like numerals or other symbols. Applying power to one cathode surrounds it with an orange glow discharge. The tube is filled with gas at low pressure (thanks, Wikipedia). What does that mean here? I’ll give you a hint: to operate these tubes, high voltage is required. Depending on tube and gas type, this voltage may vary. Usually, the supply voltage is about 170-200 V (of course, there are exceptions depending on tube characteristics).
Luckily, the Internet is our savior, and datasheets (technical specifications) are available for almost every tube available, so there is no need to experiment much when it comes to voltage.
Note that Nixie tubes are gas discharge devices (similar to e.g. fluorescent tubes). They require high voltage to start glowing (called ignition or start voltage, mostly around 140-170 V), and once lit, lower voltage is required to maintain glow (called sustain or working voltage). If the voltage drops below turn-off point, the tube will stop glowing.
Additionally, once the tubes are ignited, their resistance is very low, so a series resistor is necessary to limit the current, typically to 1-8 mA, depending on physical dimensions of the tube. Larger the tube, higher the current (again, you can find this in the technical specification of the tube).
As you may have already thought, high voltages and Arduino cannot be put together directly - we need an intermediate part called the driver.
The driver is translating digital signals (0-5 V) from Arduino into correct output combination required to switch on/off a segment. Most popular drivers are 74141 (e.g. SN74141, etc.) and its Ukrainian version K155ID1. In my case, it was very hard to obtain 74141 ICs, so I got K155ID1 from eBay.
There is one more thing worth mentioning and it’s related to the way of driving tubes. You can:
- use one driver per tube (like in this project)
- PROS:
- simplifies schematic and board design
- allows building clock in a modular way
- CONS:
- more expensive since more drivers are required
- PROS:
- use one driver for all tubes
- PROS:
- cheaper, as only one driver is required
- CONS:
- requires multiplexing (must be implemented in software, so you can define which tube is turned on at some point)
- increases schematic and board design complexity
- PROS:
Both are fine and it’s up to you to decide which way to go.
Electronics part - Arduino
I’m using Arduino Nano to drive the drivers. Each of the four drivers has four inputs that must be connected to the Arduino, making a total of 16 required pins just for driving the tubes.
As I mentioned, I’ll also have two separate glow indicators between the hour and minute digits - two more I/O pins.
As the main “time keeper”, I will use a DS1307-based Real Time Clock (RTC) module, which uses two I/O pins. It’s worth mentioning that RTC module has a “backup” battery, which is used if the main power supply goes off (also bought off eBay, as these modules are quite common).
You’ll also need at least two pins for pushbuttons used to set the time (hours and minutes).
Now we’re talking about at least 22 required pins (16+2+2+2), and we’ve reached Arduino Nano’s pin capacity.
As there is a limited number of I/O pins on Arduino and I wanted to leave a few spare pins, I’ve decided to introduce two 74HC595 shift registers to have additional output pins, which will be used to drive K155ID1 Nixie drivers. More about shift registers can be found here.
With shift registers (each using 3 pins), we only need 6 pins to drive 4 tubes, meaning that 10 I/O pins have been released, and can be used for e.g. temperature sensor or similar.
Power supply
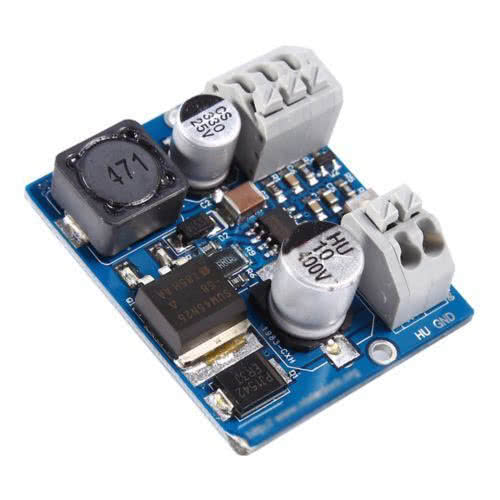
I’ve already mentioned that Nixies require a high voltage power supply; however, Arduino, shift registers, and drivers also require 5 V supply.
It is recommended to use a 12 V power supply, as Arduino Nano has an integrated voltage regulator which will regulate 12 V to 5 V, and then you’ve got Arduino and the rest of the electronics covered.
For powering Nixies using 12 V, it’s probably best to use voltage converters, and there are few variable step-up voltage converters available. These converters are raising the voltage from 12 V to e.g. 170 V. I bought mine off eBay for $15, and it’s working perfectly. It’s good to have a variable supply, that way you can use it with different tubes.
Schematic and boards
Instead of building one large board which will host all Nixies, drivers, Arduino Nano, etc. I’ve decided to go with a modular approach. The main reasons for that decision are:
- I’m building my own PCBs (instead of sending them to PCB fabrication house),
- smaller boards are easier to make in DIY, and
- it’s easier to replace a small board instead of creating a whole new one.
With that in mind, I created 4 modules (schematics and matching boards):
- Main logic board - serves as Arduino Nano shield and “breakout” board
- Expander board - holds the shift registers and connects to the main logic board, as well as two driver boards
- Driver board - holds one K155ID1 IC, connects to expander and tube boards
- Tube board - holds the tube (using improvised sockets for tube pins) and connects to the driver board
Here is a graphical representation of the structure explained above:
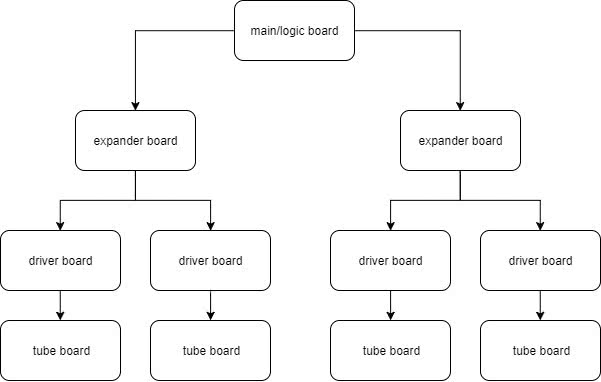
As you can see, with this approach, it is very easy to replace a board (module) if it gets broken, or if I decide to replace the tubes with different ones - instead of rebuilding the whole board.
The boards are interconnected using flat cables and IDC connectors, and I’ve predicted the boards stacked one atop another, which can be seen from the images.
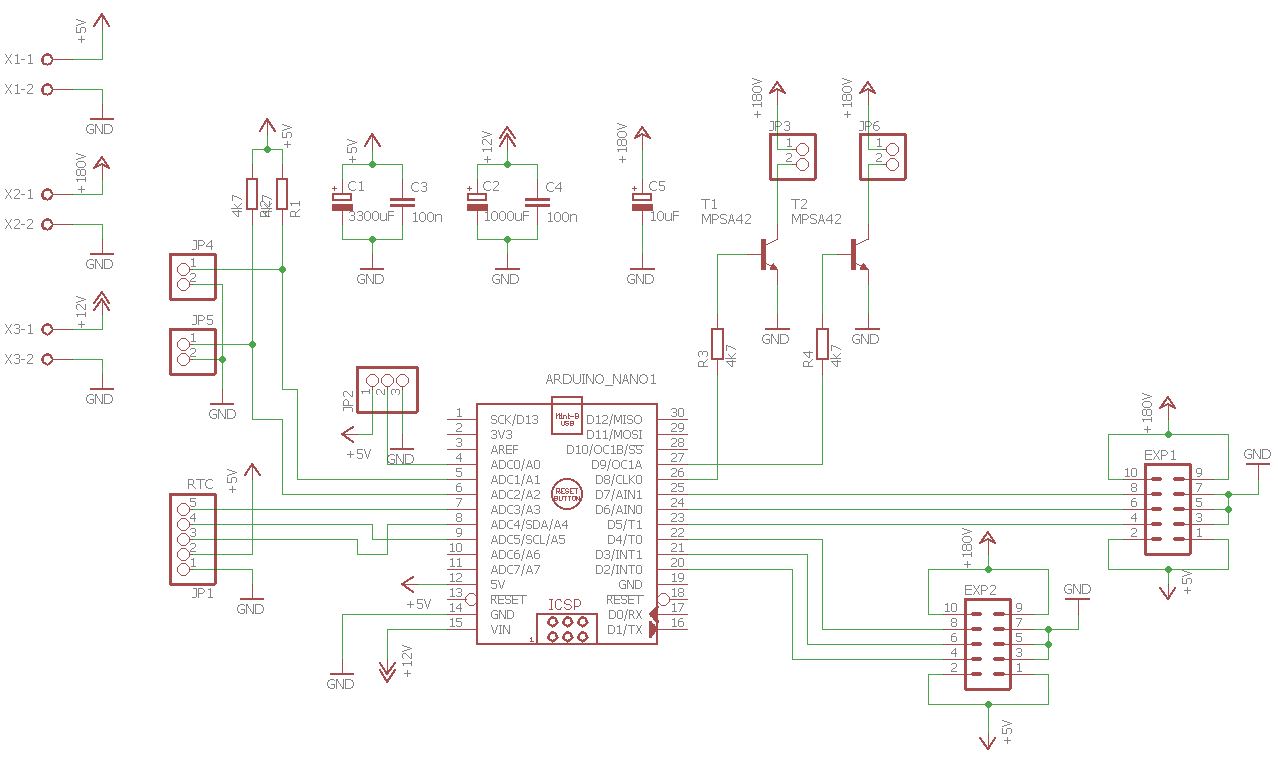
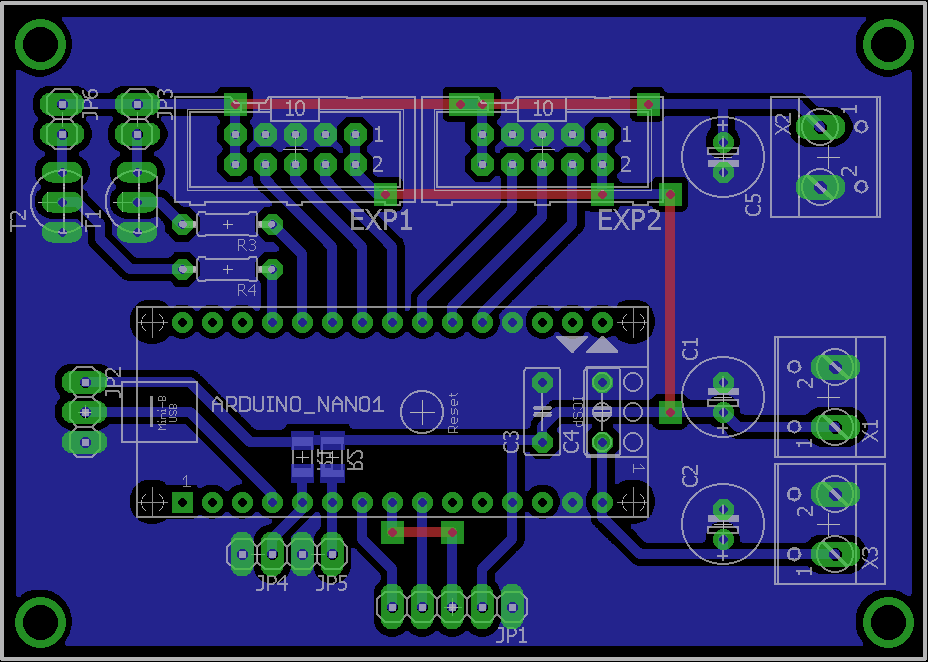
Main board
Main board schematic:
Main board design:
Main board built:
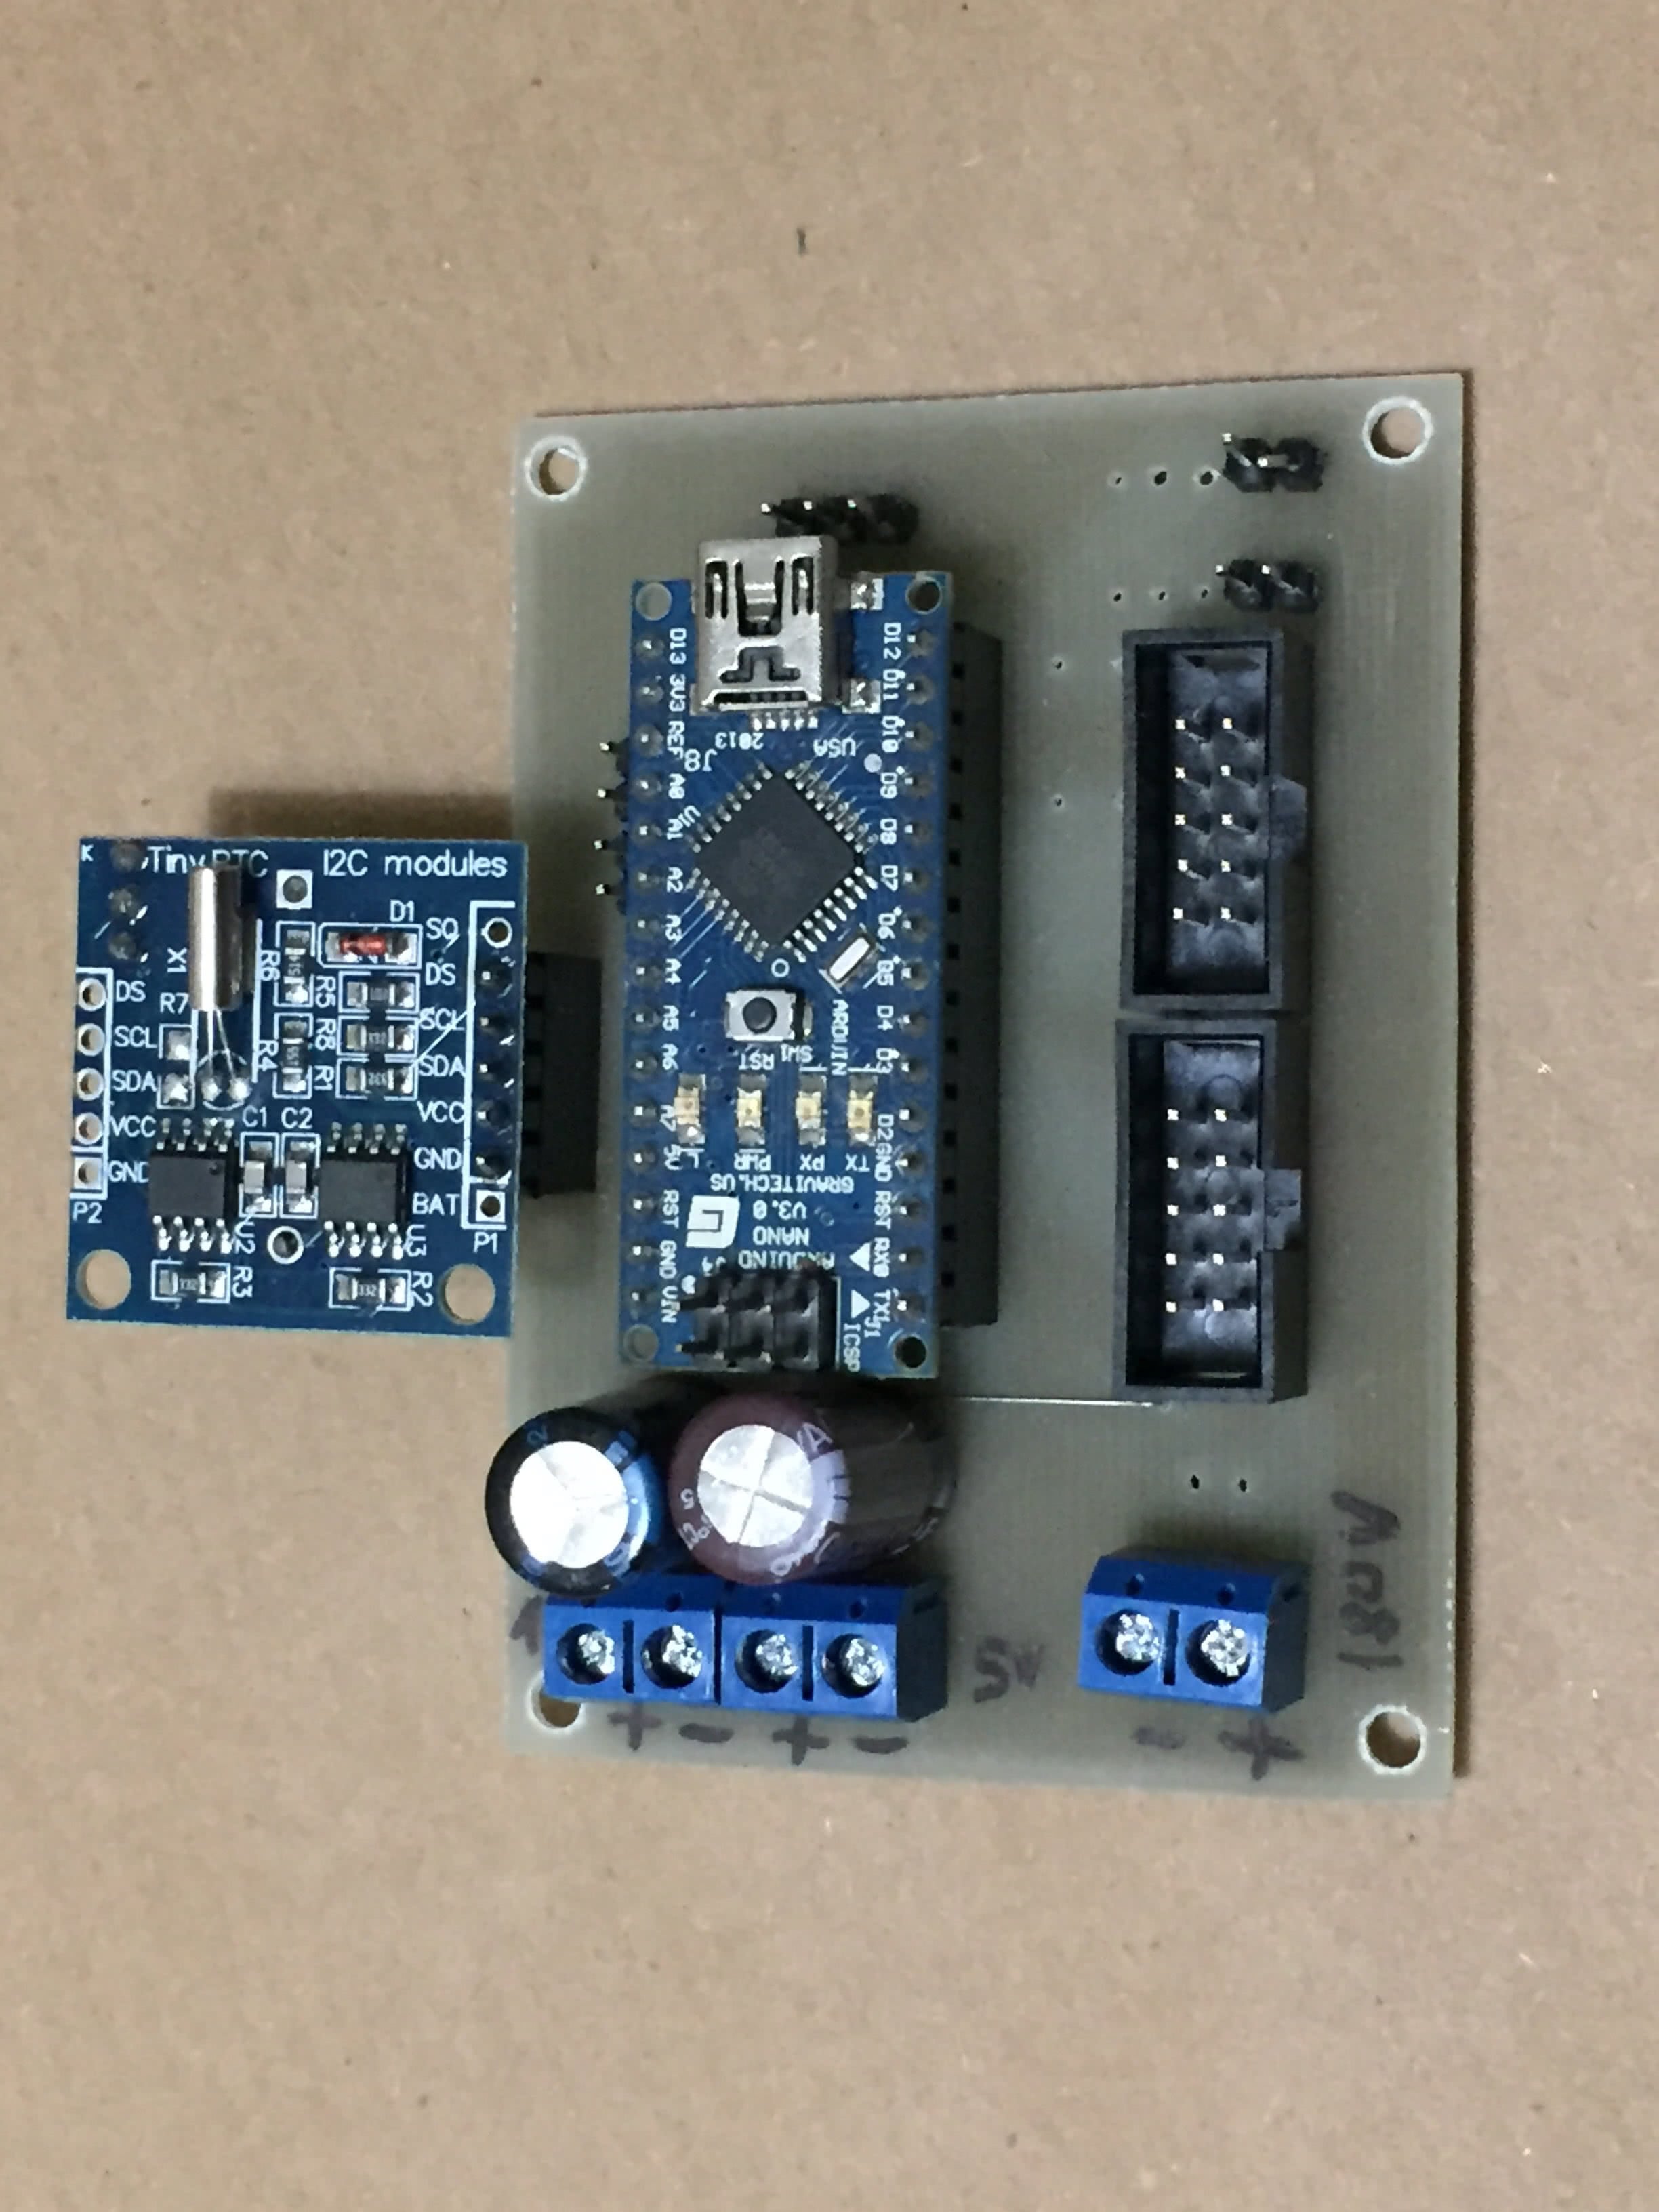
The schematic is quite simple; it contains a component which represents Arduino Nano, many connectors (voltage supply, RTC module, pushbuttons, expander board, indicators), some capacitors to stabilize the voltage, etc.
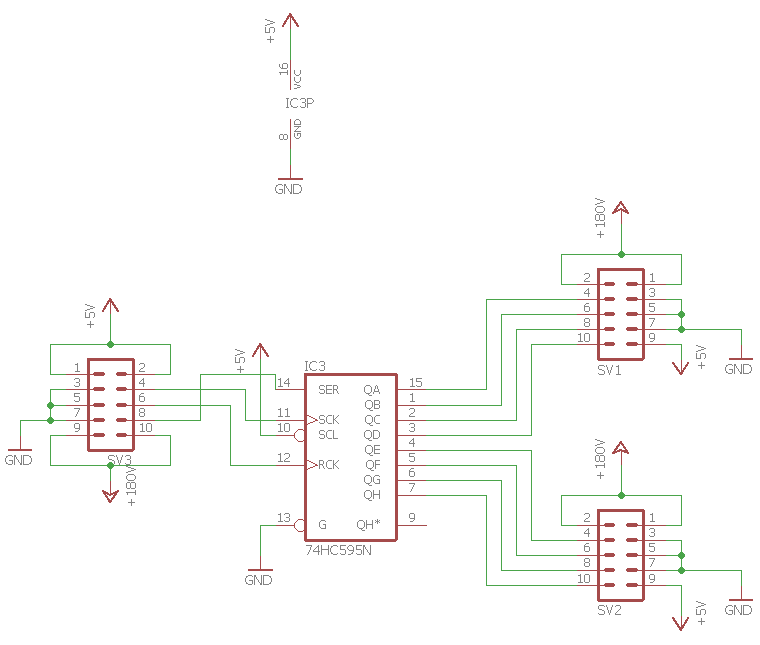
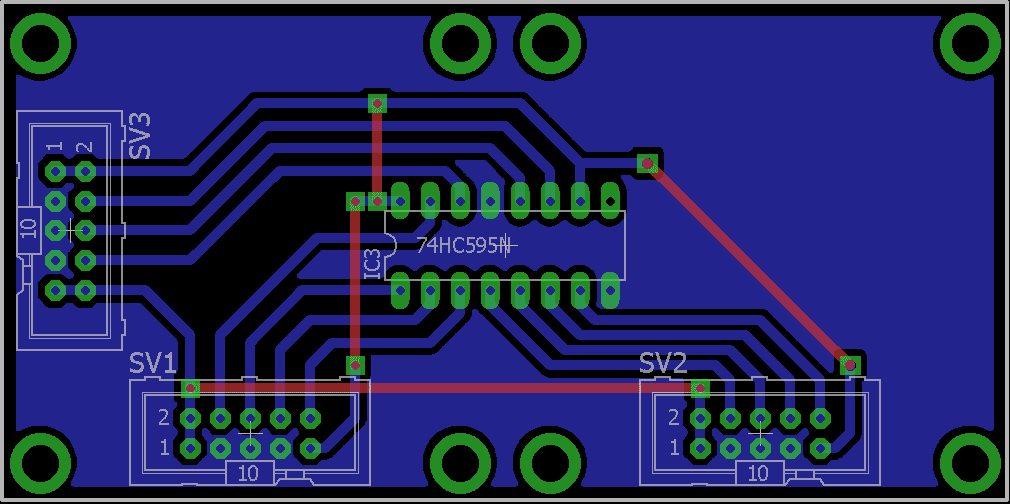
Expander board
Expander board schematic:
Expander board design:
 Expander board built:
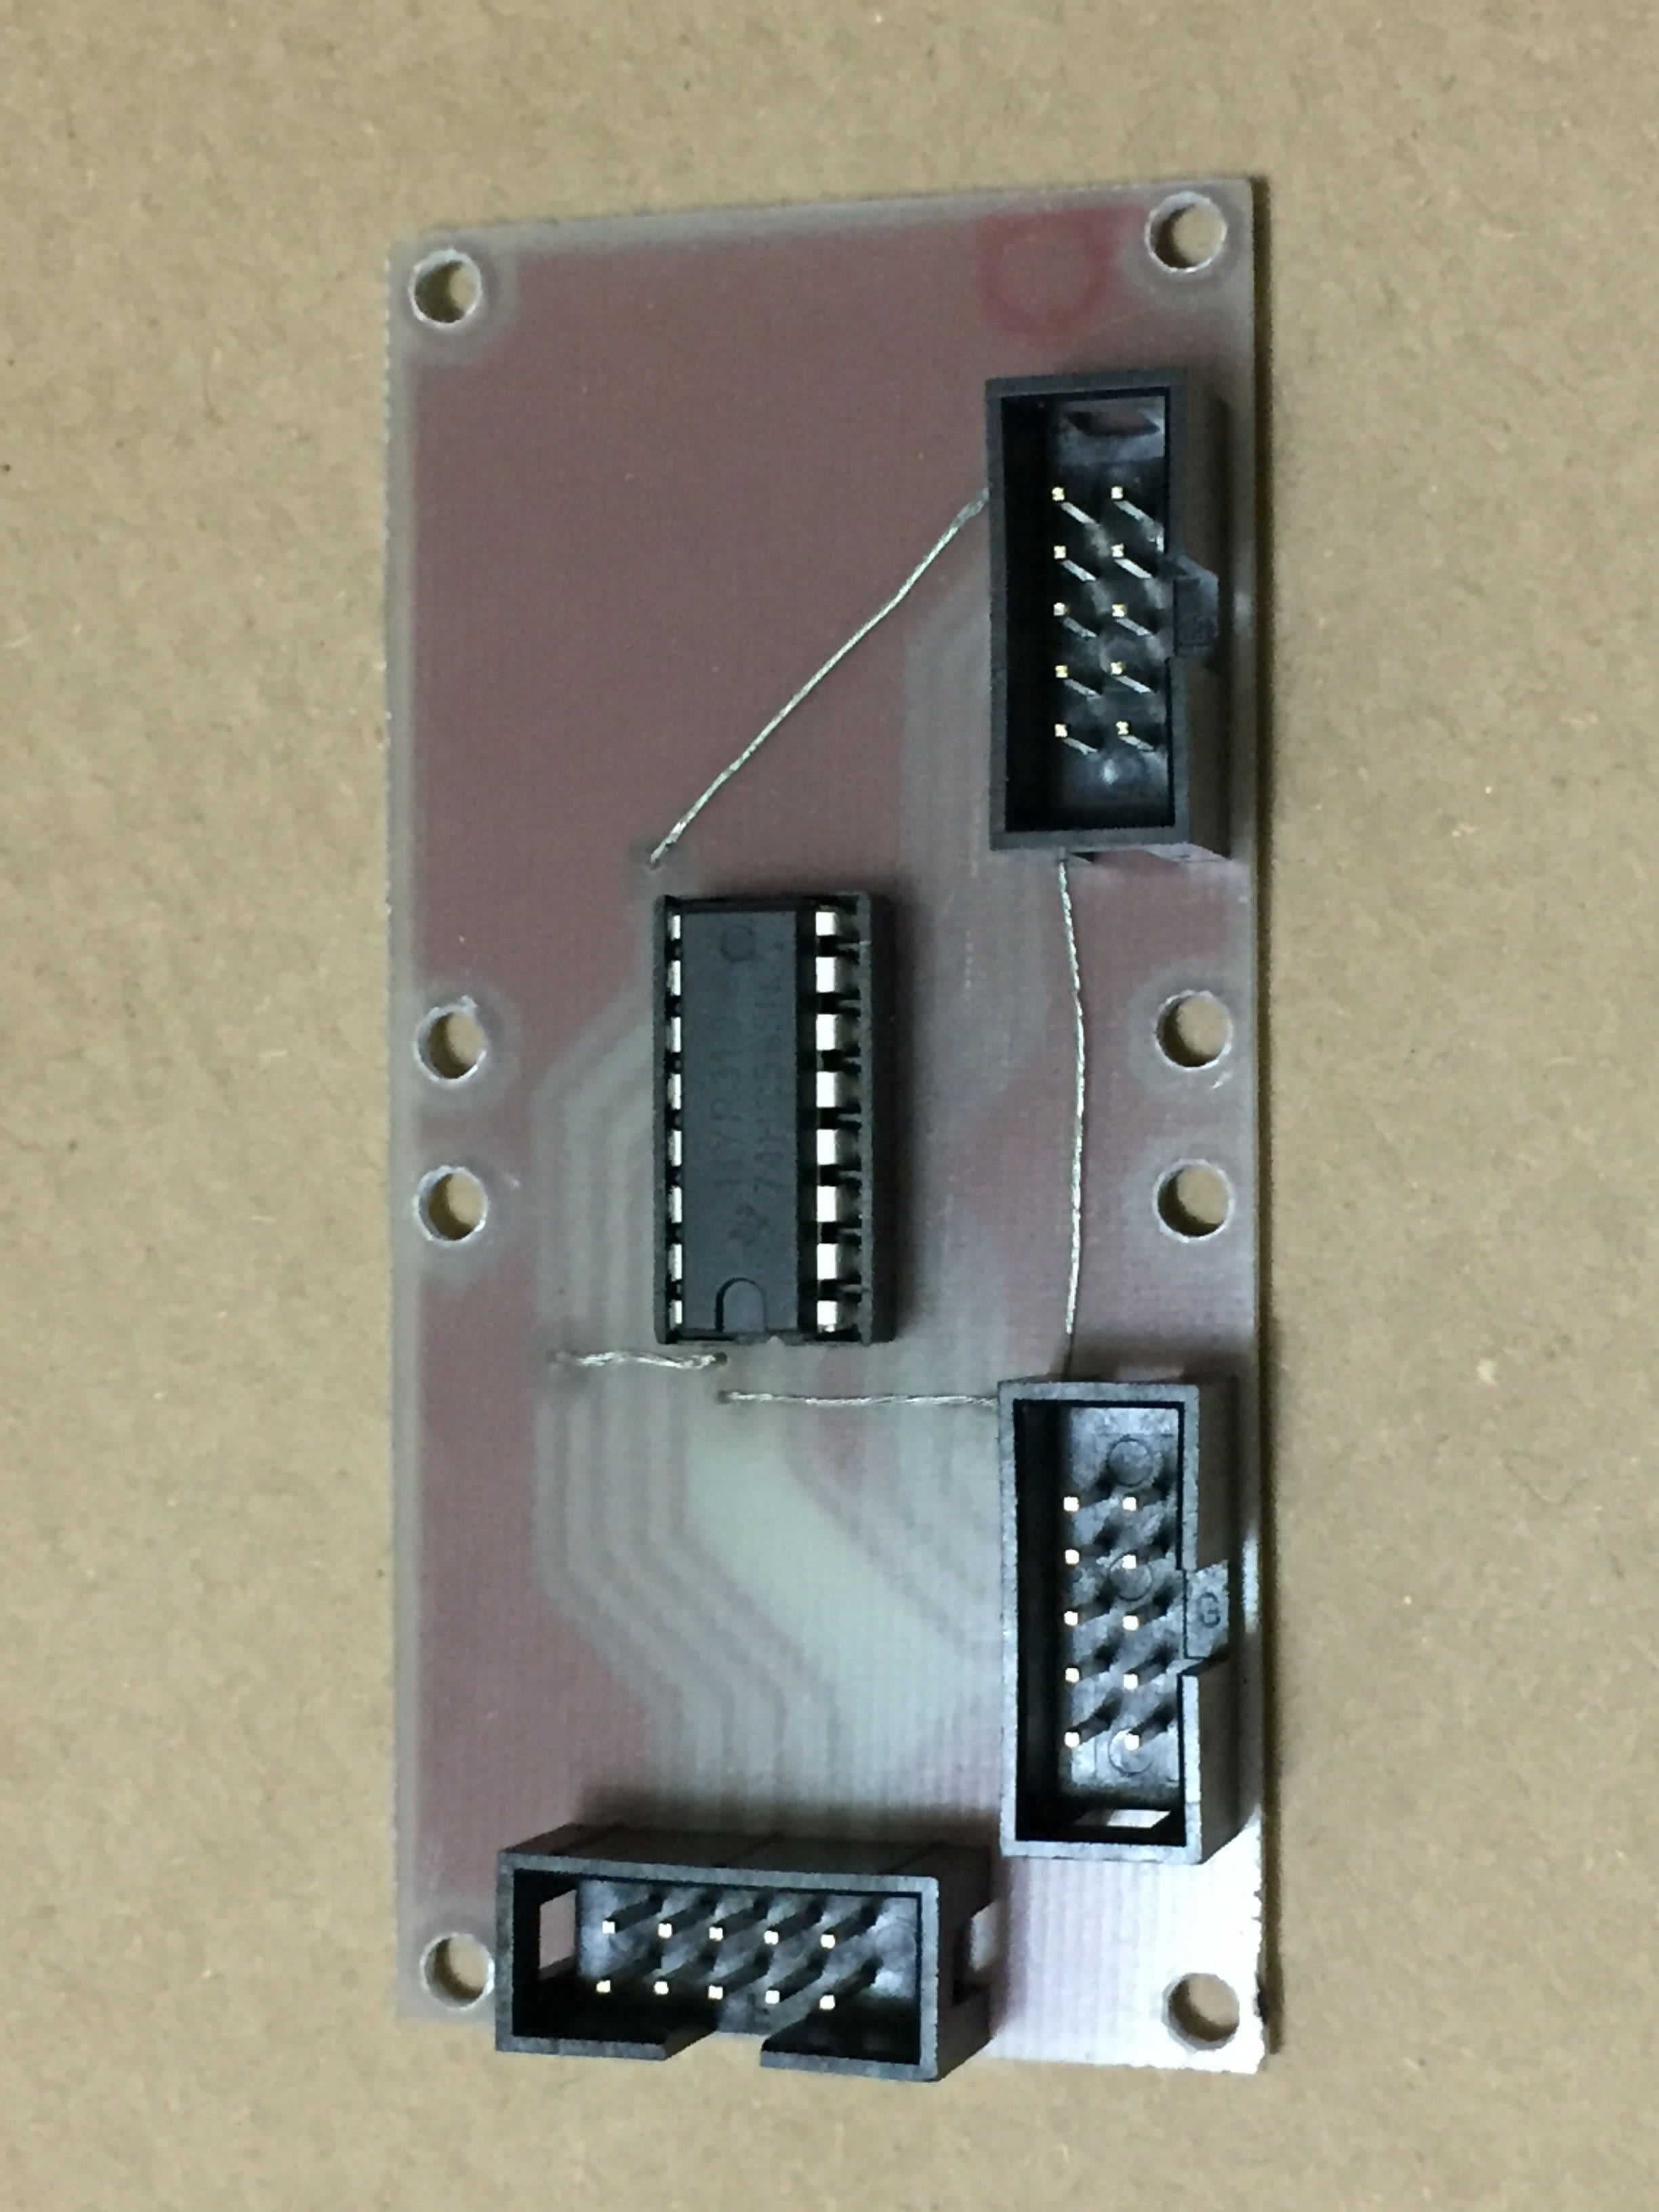
The Expander board holds a 74HC595 shift register, which interfaces with the main board and two driver boards.
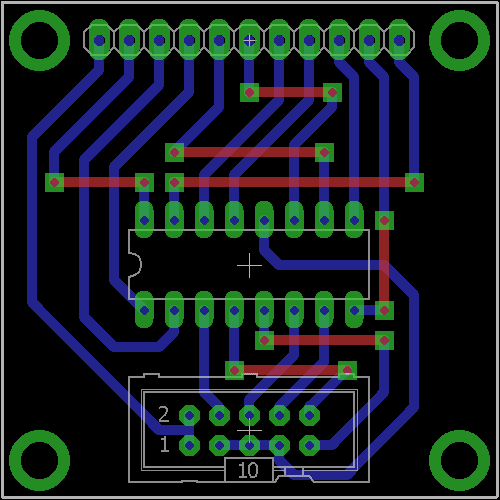
Driver board
Driver board schematic:
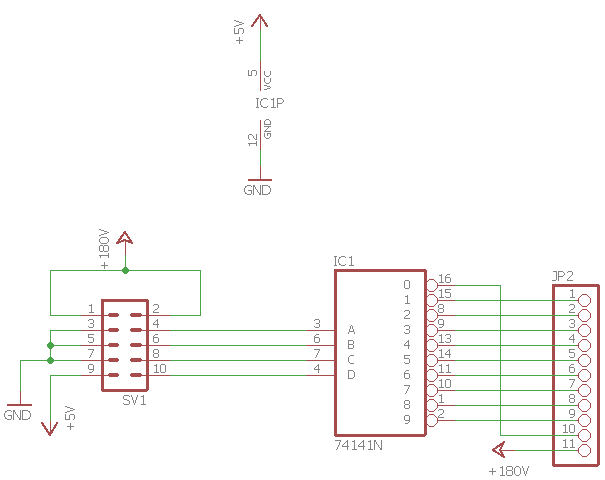
Driver board design:
Driver board built:
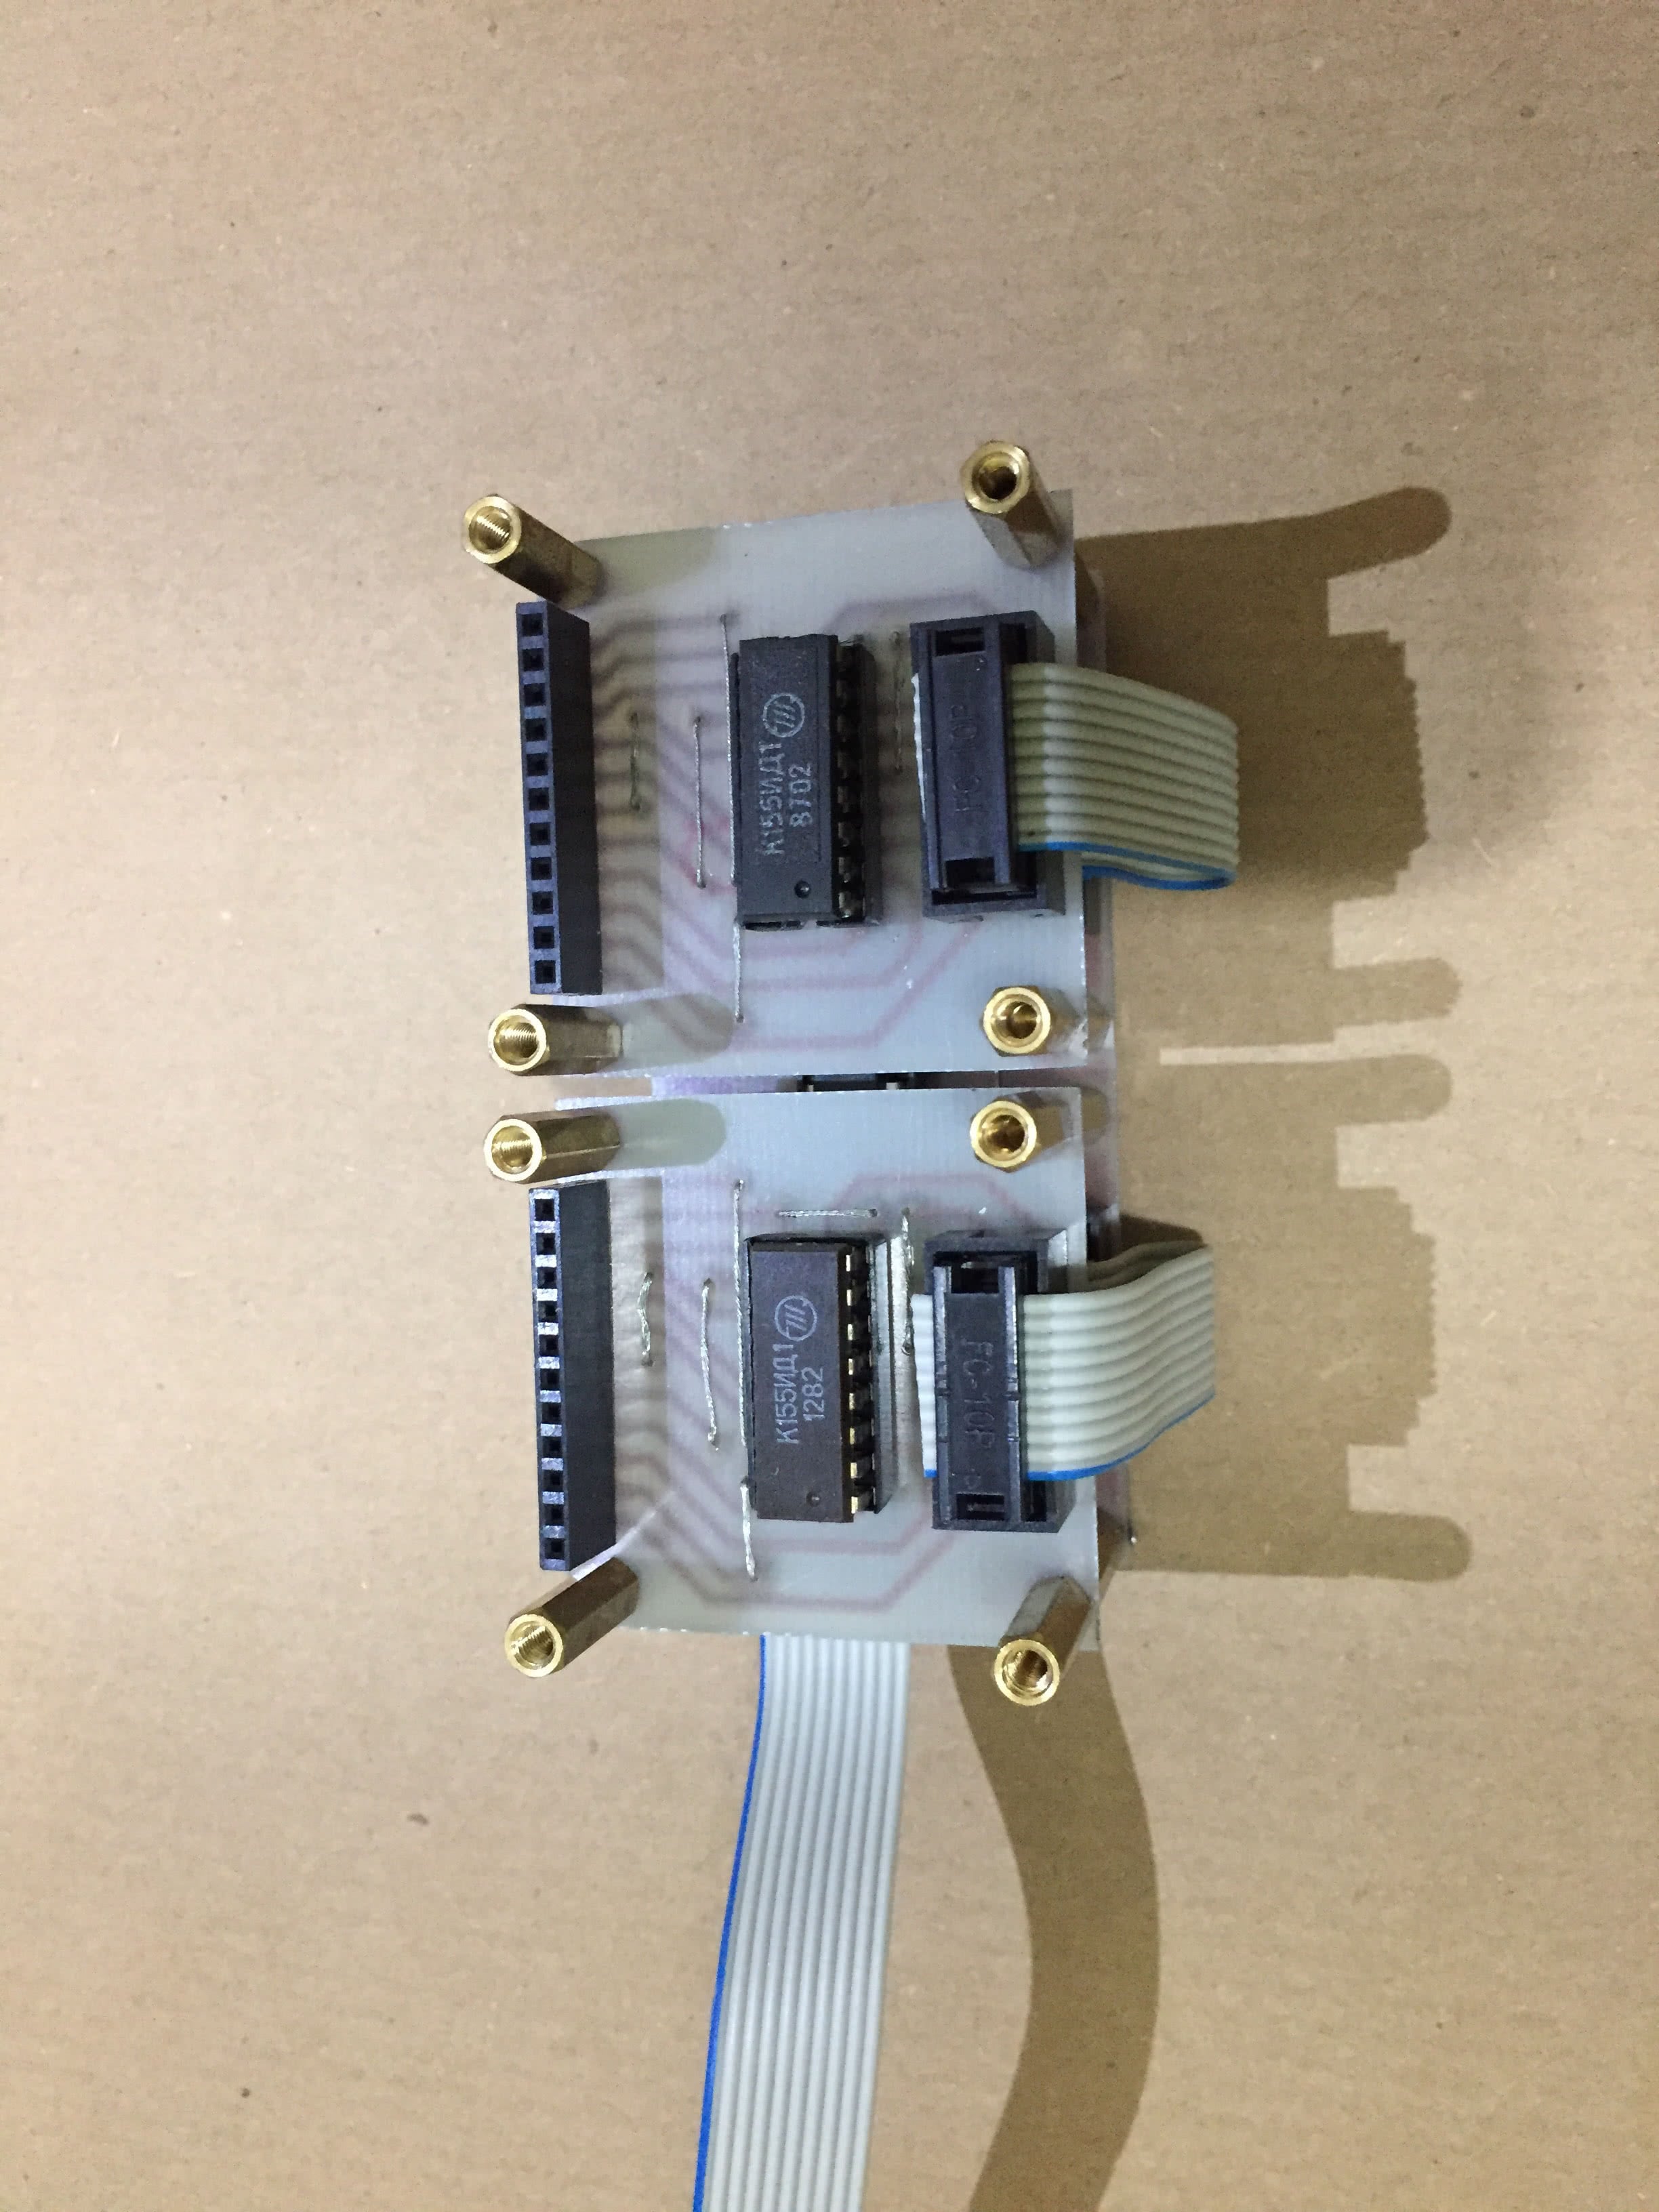
It contains 74141 (actually K155ID1, since they are pin-to-pin compatible) integrated circuit, and connects to the expander and Nixie board.
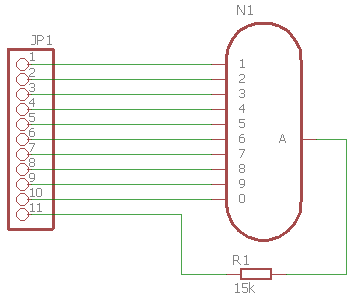
Finally, the simplest board:
Tube board
Tube board schematic:
Tube board design:
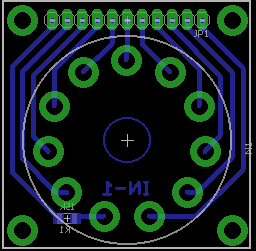
It is necessary to mention that R1 value is quite important, and can be calculated using the formula: R = (Vsp - Vsu) / I, where Vsp is the Supply voltage, Vsu is the Sustain voltage, and I is the current being drawn when one segment in the tube is lit. Lower current may cause some segments not to be lit, while current higher than allowed can cause tube damage.
Software
Arduino code is rather simple and for the most part self-explanatory.
Since I’m using a very popular RTC module with DS1307 IC, I’m utilizing temperature sensor DS18B20 available on the same board, so several libraries are required.
In the Setup method, it’s necessary to set up the pin states and initialize RTC and Temperature sensor.
In the Loop method, input pins (connected to pushbuttons for the hour/minute adjustment) are being checked, a current time is pulled from RTC, as well as temperature from the temperature sensor.
WriteHours and WriteMinutes methods are very similar and used to send data to the shift registers. Sent data will then be “visible” to Nixie driver, and reflected on tube state.
Code:
// First we include the libraries
#include <OneWire.h>
#include <DallasTemperature.h>
#include <Wire.h>
#include "RTClib.h"

RTC_DS1307 rtc;

/********************************************************************/
// Data wire is plugged into pin A3 on the Arduino
#define ONE_WIRE_BUS A3
/********************************************************************/
// Setup a oneWire instance to communicate with any OneWire devices
// (not just Maxim/Dallas temperature ICs)
OneWire oneWire(ONE_WIRE_BUS);
/********************************************************************/
// Pass our oneWire reference to Dallas Temperature
DallasTemperature sensors(&oneWire);
/********************************************************************/

//Pin connected to SH_CP of 74HC595 - pin 11 on ic
int hoursClockPin = 2;
//Pin connected to ST_CP of 74HC595 - pin 12 on ic
int hoursLatchPin = 3;
//Pin connected to DS of 74HC595 - pin 14 on ic
int hoursDataPin = 4;

//Pin connected to SH_CP of 74HC595 - pin 11 on ic
int minutesClockPin = 5;
//Pin connected to ST_CP of 74HC595 - pin 12 on ic
int minutesLatchPin = 6;
//Pin connected to DS of 74HC595 - pin 14 on ic
int minutesDataPin = 7;

int hoursPlusPin = A1;
int minutesPlusPin = A2;


void setup() {
  //set pins to output so you can control the shift register
  pinMode(hoursClockPin, OUTPUT);
  pinMode(hoursLatchPin, OUTPUT);
  pinMode(hoursDataPin, OUTPUT);
  pinMode(minutesClockPin, OUTPUT);
  pinMode(minutesLatchPin, OUTPUT);
  pinMode(minutesDataPin, OUTPUT);
  pinMode(hoursPlusPin, INPUT);
  pinMode(minutesPlusPin, INPUT);
  digitalWrite(hoursPlusPin, HIGH);
  digitalWrite(minutesPlusPin, HIGH);

  while (!Serial); // for Leonardo/Micro/Zero

  Serial.begin(9600);
  if (! rtc.begin()) {
    Serial.println("Couldn't find RTC");
    while (1);
  }

  if (! rtc.isrunning()) {
    Serial.println("RTC is NOT running! Adjusting to time of code compilation");
    rtc.adjust(DateTime(F(__DATE__), F(__TIME__)));
  }

  sensors.begin();
}

void loop() {
  DateTime now = rtc.now();
  int seconds = now.second();

  int hoursButtonValue = digitalRead(hoursPlusPin);  // read input value
  int minutesButtonValue = digitalRead(minutesPlusPin);  // read input value

  if (hoursButtonValue == LOW) {         // check if the input is LOW (button pressed)
    int newValue = now.hour() + 1;
    if (newValue > 59) {
      newValue = 0;
    }
    rtc.adjust(DateTime(now.year(), now.month(), now.day(), newValue, now.minute(), 0));
  }

  if (minutesButtonValue == LOW) {         // check if the input is LOW (button pressed)
    int newValue = now.minute() + 1;
    rtc.adjust(DateTime(now.year(), now.month(), now.day(), now.hour(), newValue, 0));
  }


  if (seconds >= 30 && seconds < 34) {
      sensors.requestTemperatures(); // Send the command to get temperature readings

      double temperature = sensors.getTempCByIndex(0);
      int integer_part = floor(temperature);
      int decimal_part = fmod(temperature,1)*100;

      writeHours(integer_part);
      writeMinutes(decimal_part);
  }
  else {
      writeHours(now.hour());
      writeMinutes(now.minute());
  }
}

void writeHours(int val)
{
    digitalWrite(hoursLatchPin, LOW);
    byte value = decToBcd(val);
    value = ((byte)value << 4) | ((byte)value >> 4); // switch nibble places so that hour digits are on correct places, and not inverted
    shiftOut(hoursDataPin, hoursClockPin, MSBFIRST, value);
    digitalWrite(hoursLatchPin, HIGH);
}

void writeMinutes(int val)
{
    digitalWrite(minutesLatchPin, LOW);
    byte value = decToBcd(val);
    value = ((byte)value << 4) | ((byte)value >> 4); // switch nibble places so that minute digits are on correct places, and not inverted
    shiftOut(minutesDataPin, minutesClockPin, MSBFIRST, value);
    digitalWrite(minutesLatchPin, HIGH);
}


// Convert normal decimal numbers to binary coded decimal
byte decToBcd(byte val)
{
  return( (val/10*16) + (val%10) );
}
Conclusion
Finally, here are few pictures of the finished clock - neat, huh?
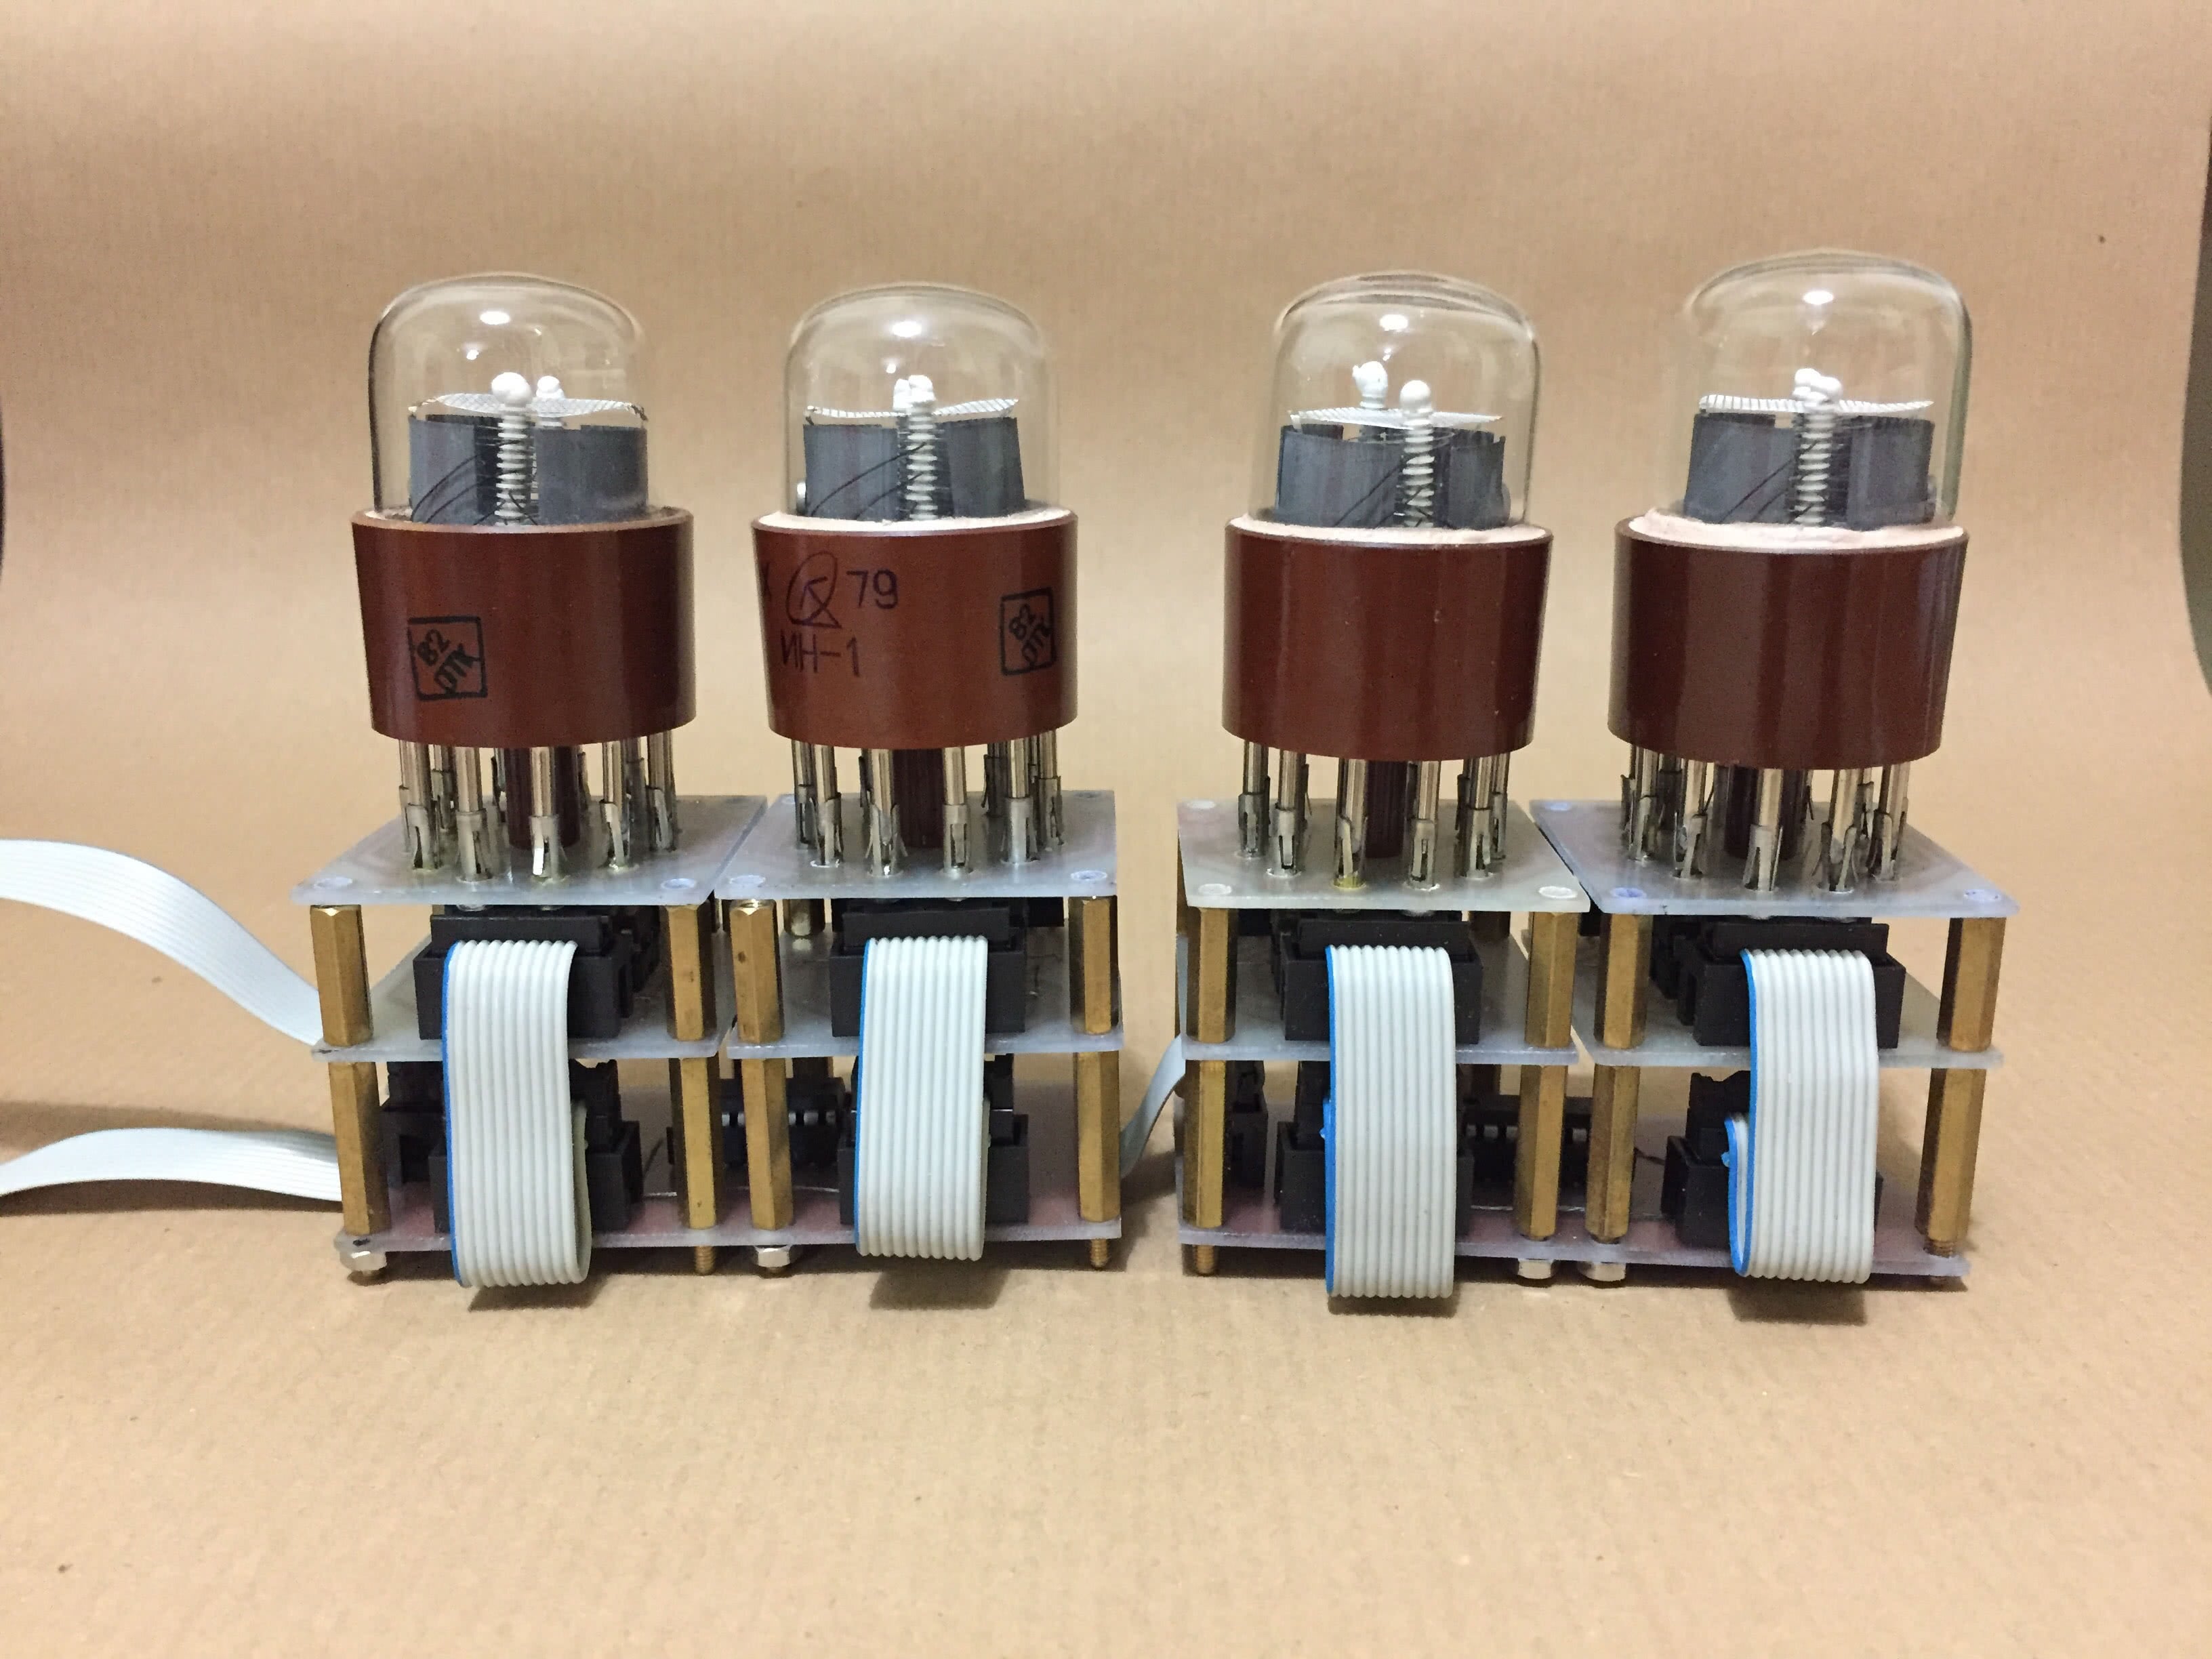
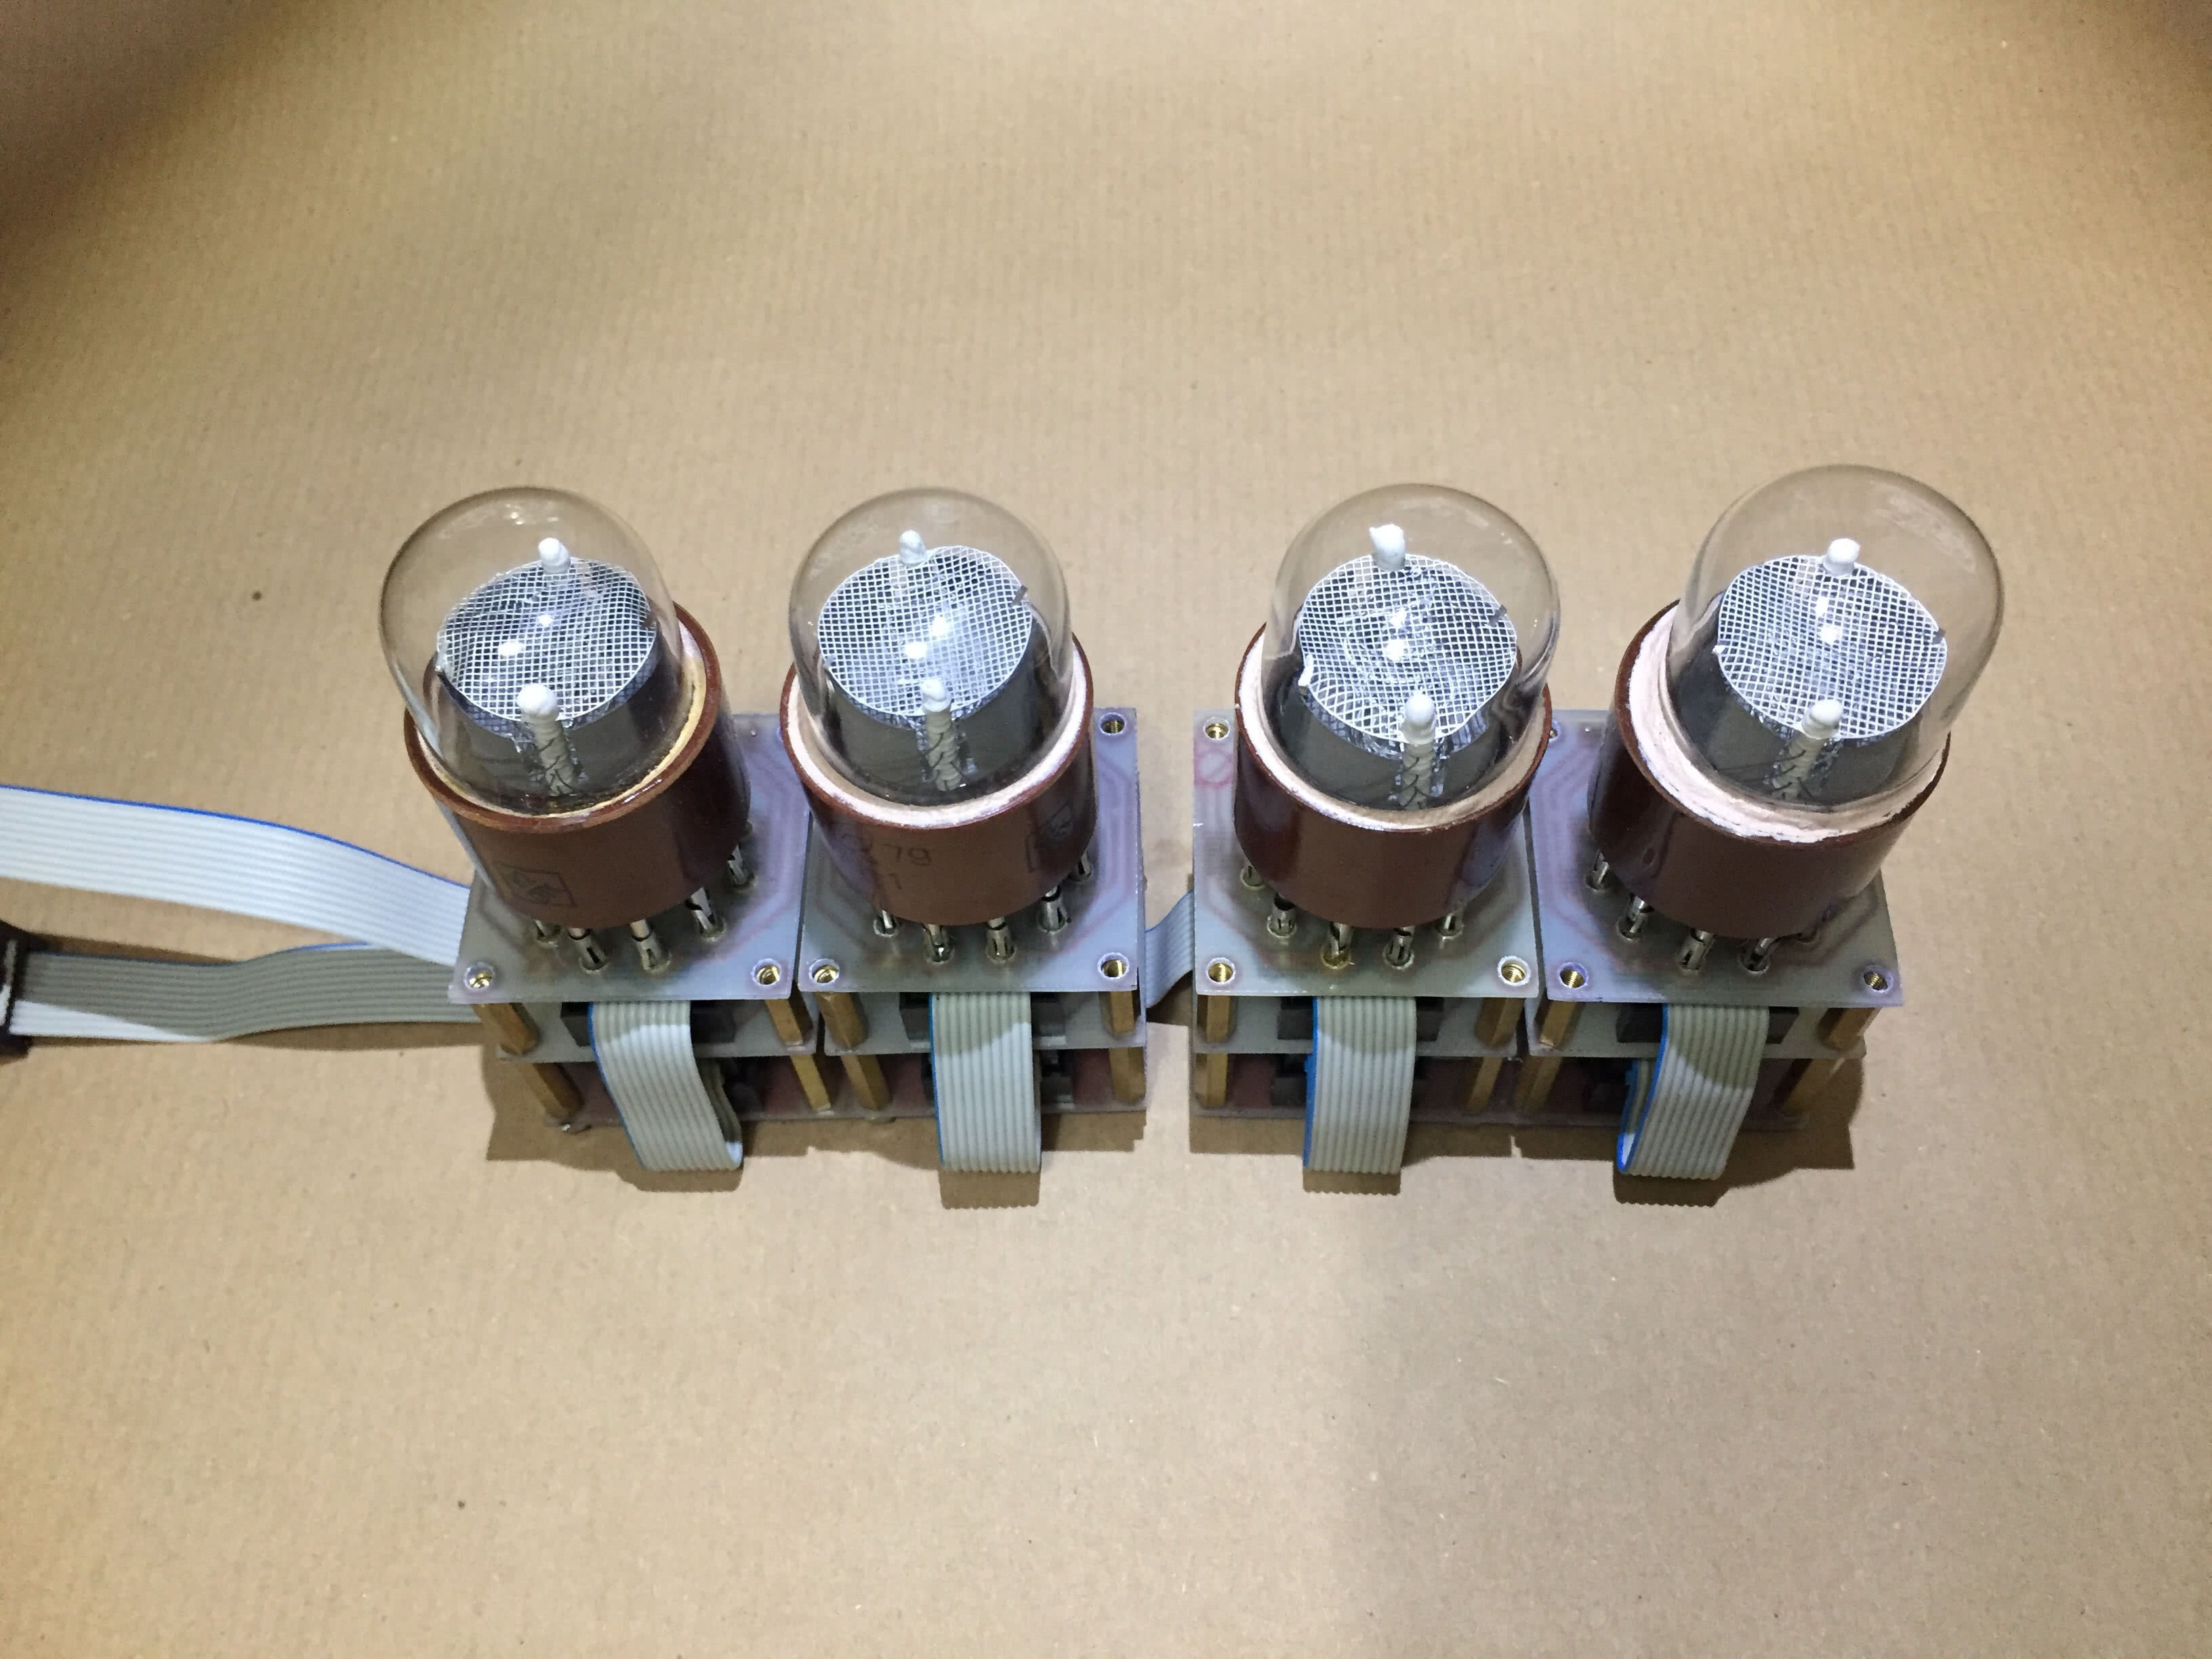
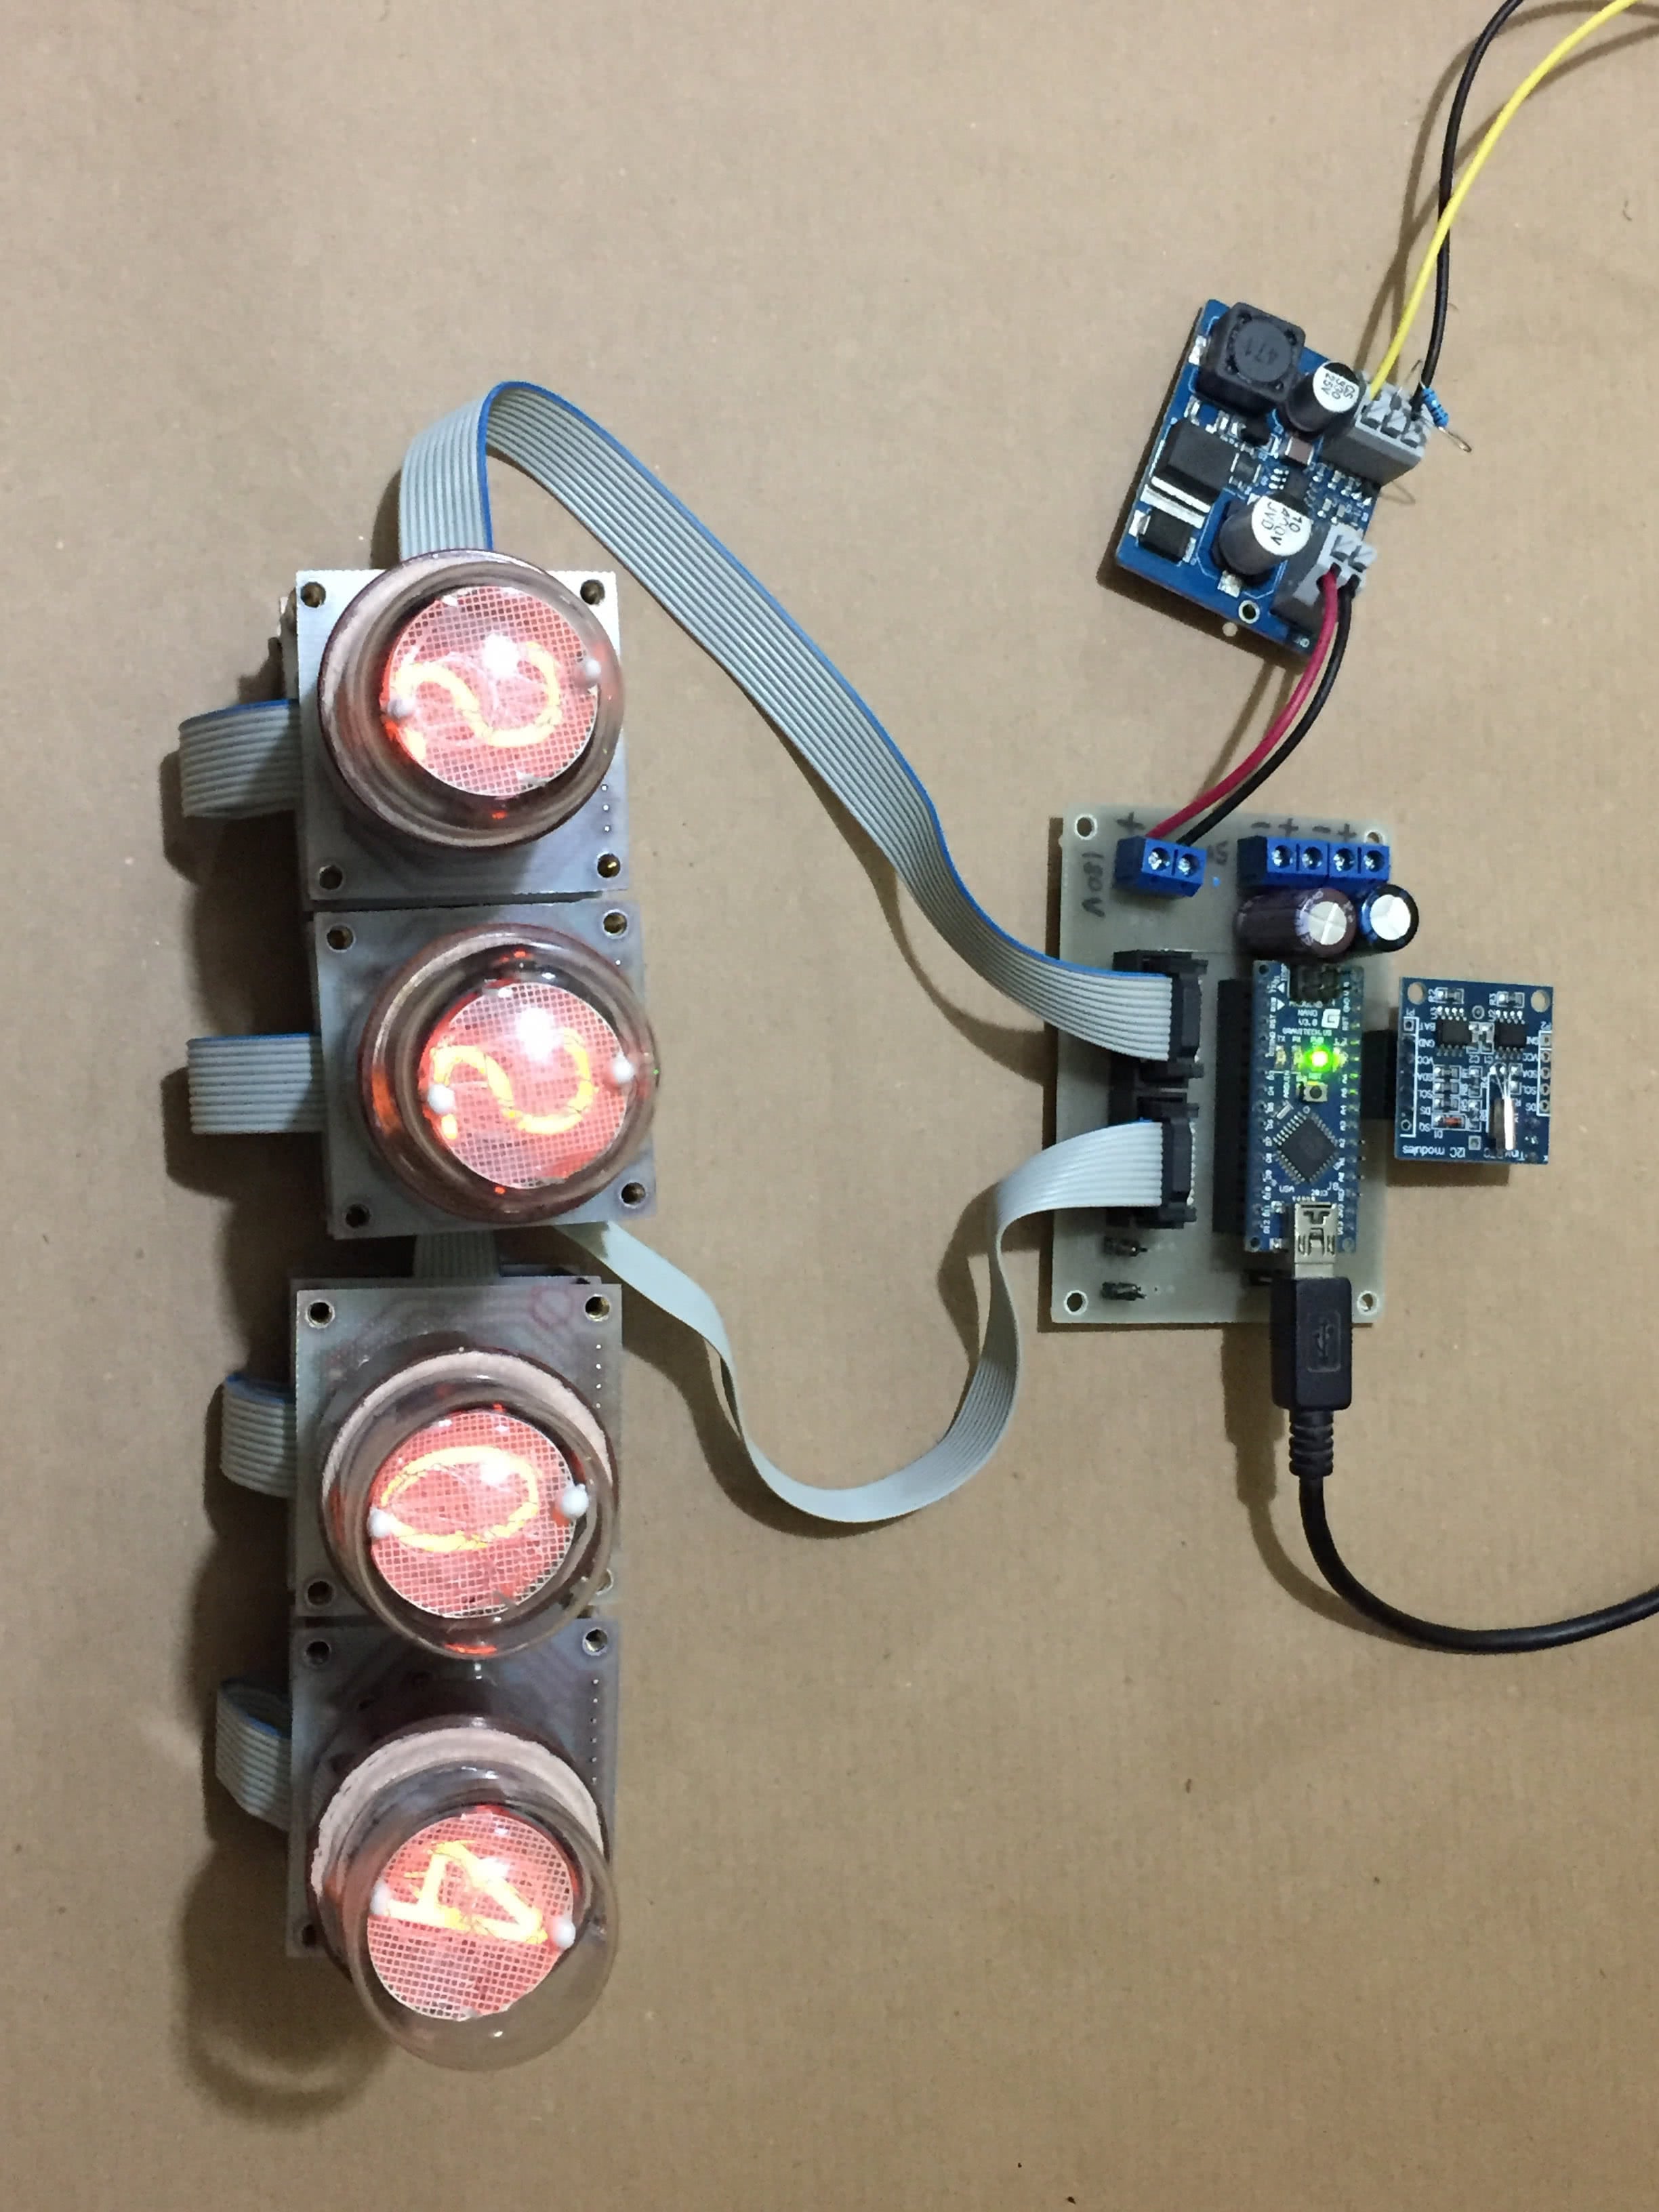
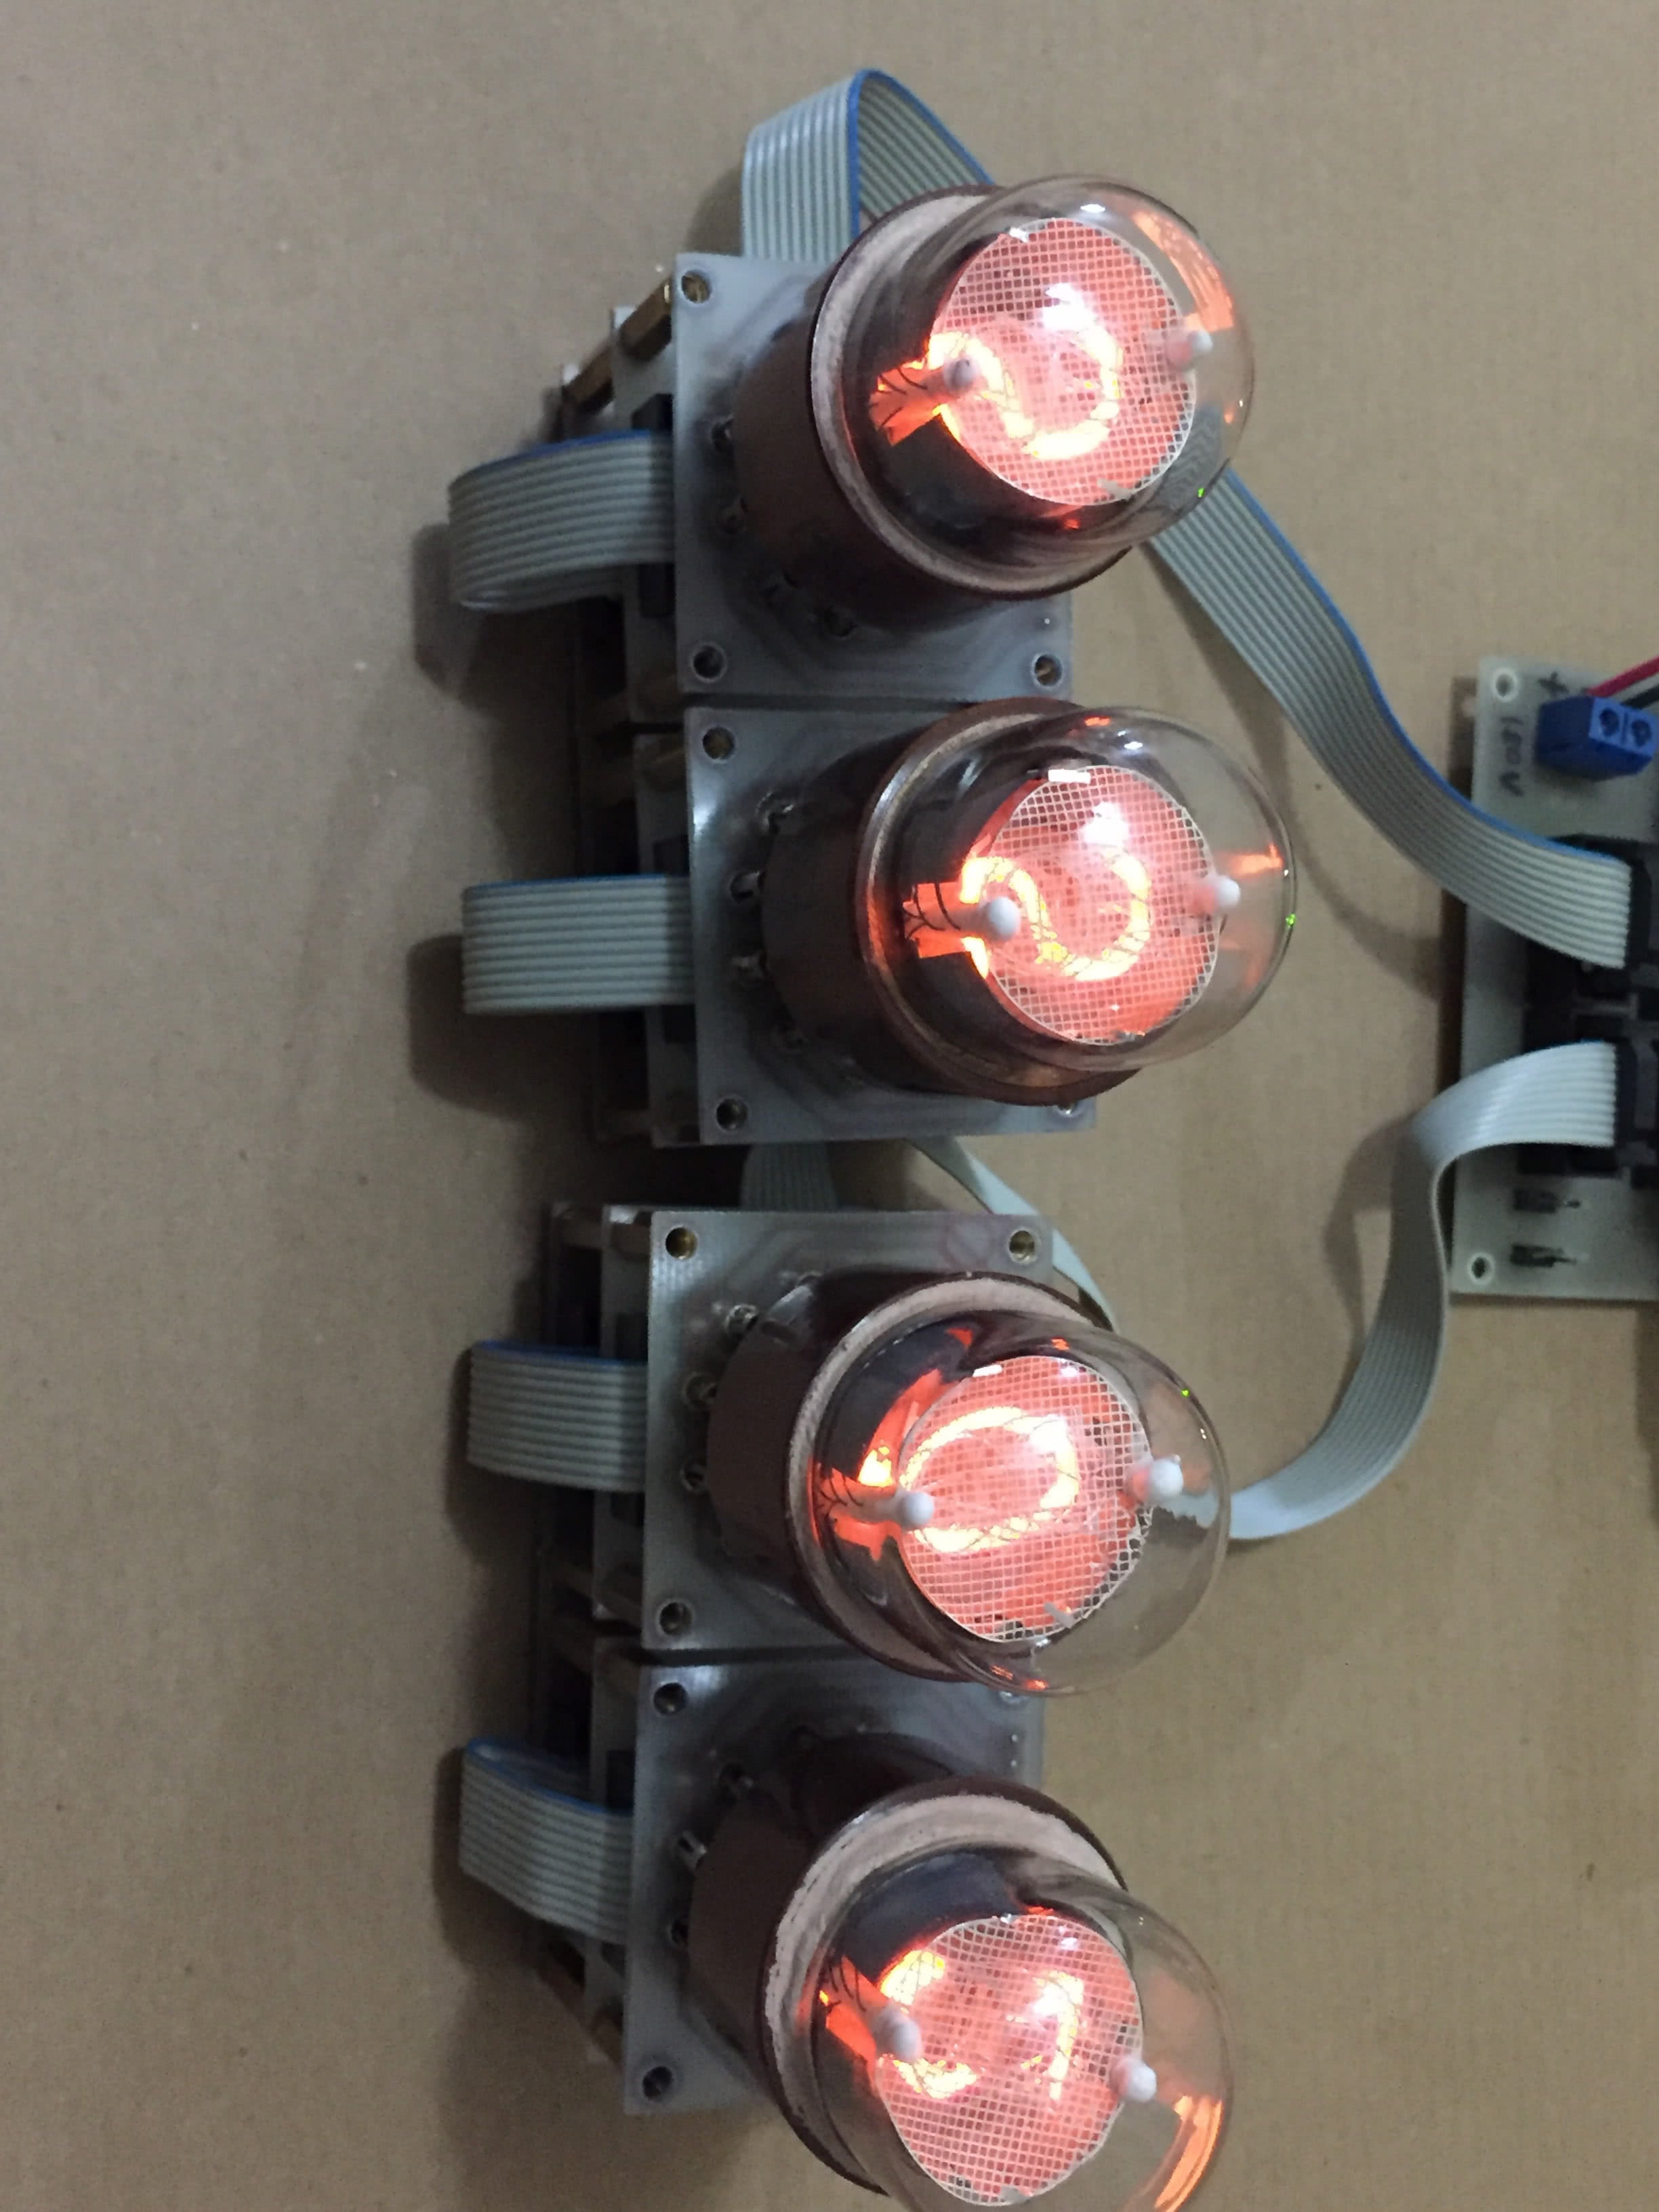
Note: due to a lack of housing, the colon indicator tubes aren’t visible here.
Nixie clocks are beautiful and can be cool having one in your home - on the shelf, above the fireplace…
Further steps would be to create a housing - there are many ideas available online, and most of them include wood, which looks awesome, and I’ll probably go with that too.
I’ll keep you folks updated, I promise!